Oracle VPS部署V2Ray
1 前言
本文介绍如何使用甲骨文(Oracle)的免费VPS部署V2Ray
甲骨文服务器申请地址:
https://www.oracle.com/cloud/free/
c7 / 7q / F+
2 域名申请
!!本节使用Firefox浏览器操作!!
2.1 Firefox浏览器Gooreplacer插件设置
防止freenom在订单提交阶段失败
安装完插件后,点击“配置规则”

规则配置
重定向填写:
https://www.google.com/recaptcha
目标地址填写:
https://www.recaptcha.net/recaptcha
2.2 freenom域名申请
freenom可以申请免费的域名,申请地址:
登录,选择”注册一个新域名”

输入需要注册的域名名

- 选择免费域名,加入购物车
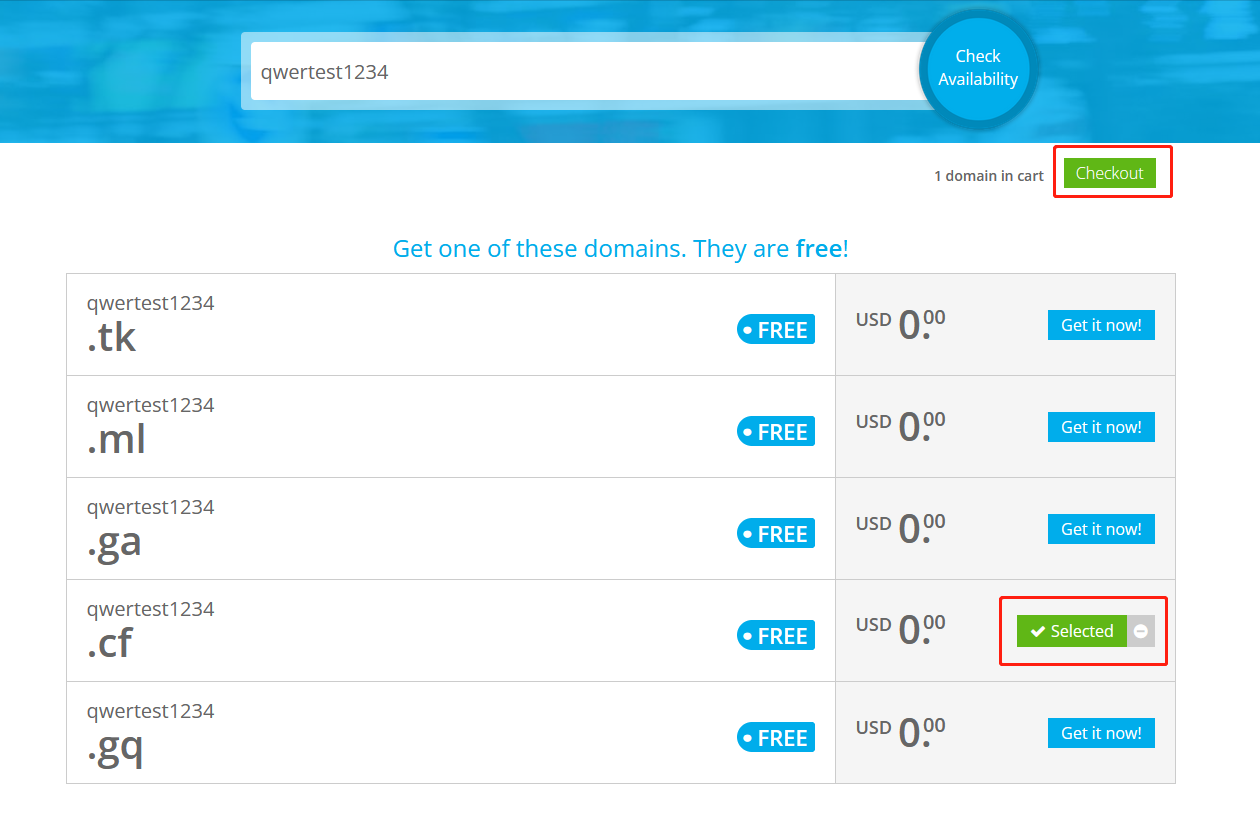
- 期限修改为12个月

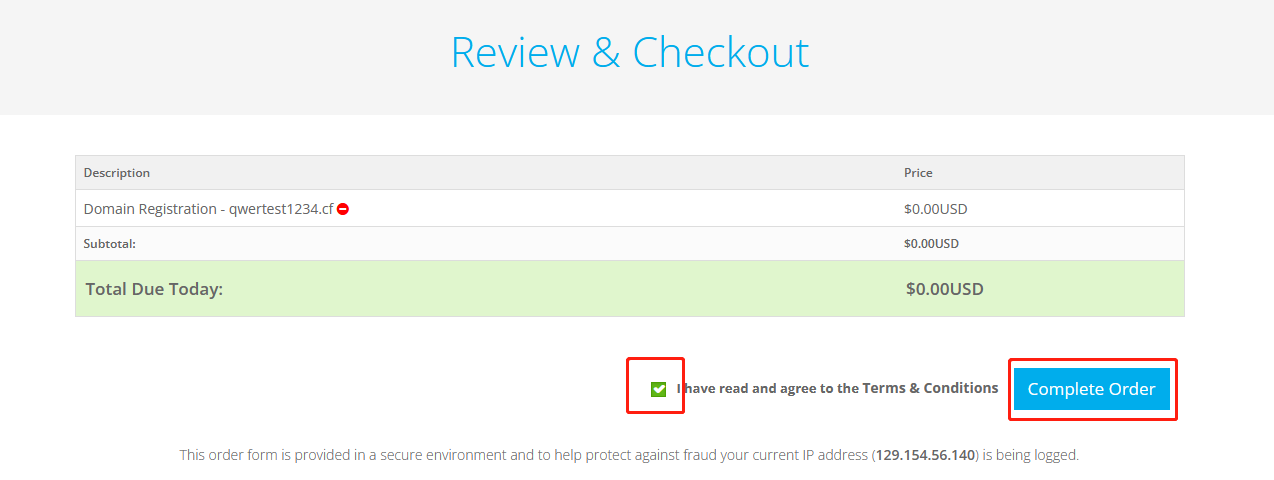
- 勾选允许协议,点击完成
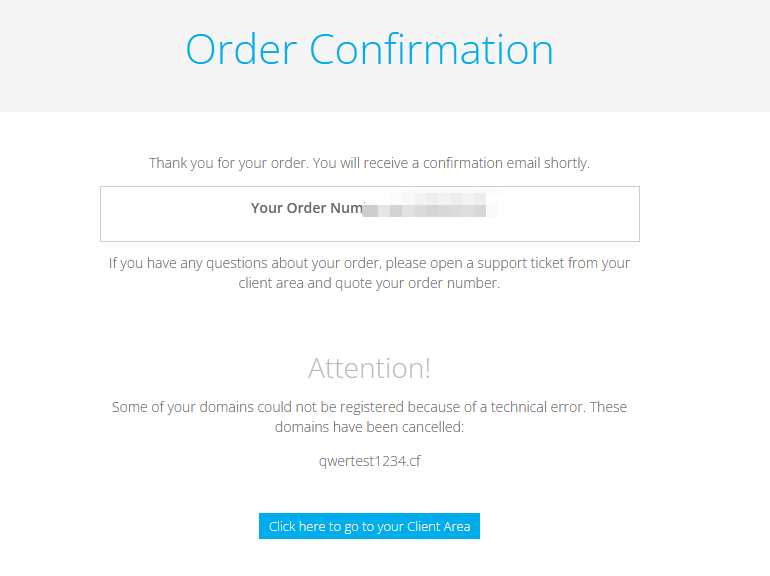
- 看到此界面,说明申请成功,如果申请失败,回到2.1检查Gooreplacer插件是否配置正常
- 查看我的域名

设置域名

添加域名解析
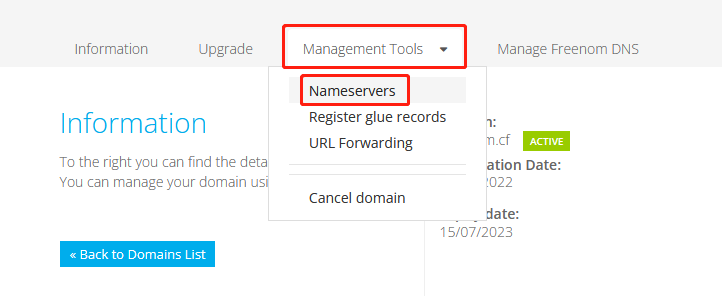
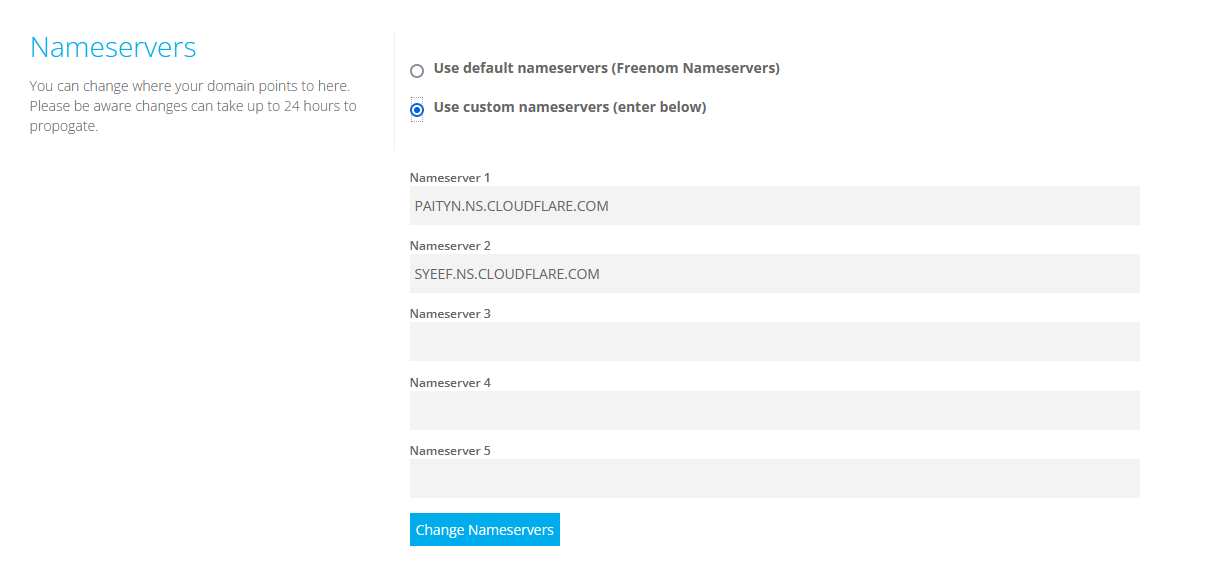
填写域名解析服务器
PAITYN.NS.CLOUDFLARE.COM
SYEEF.NS.CLOUDFLARE.COM
3 域名解析配置(CDN)
这里使用cloudflare
添加站点

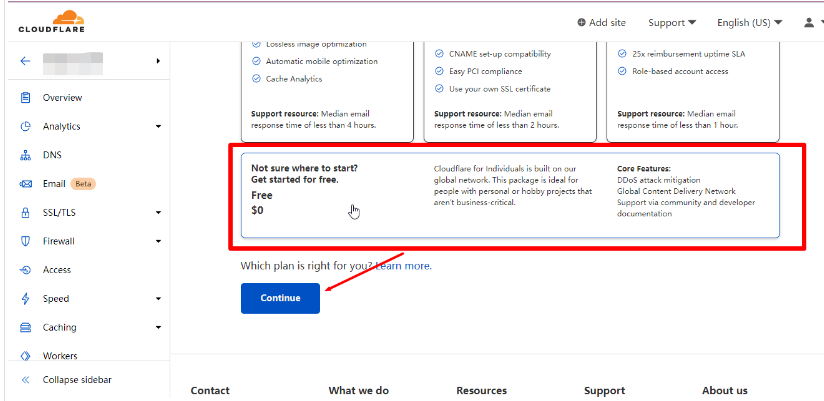
选择免费的方案
添加VPS服务器地址

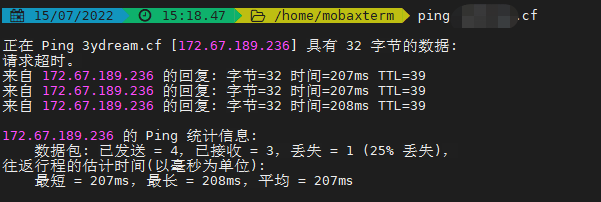
校验服务器是否生效:
解析的IP不一致,是因为勾选了”代理“,不影响正常使用
4 VPS部署V2Ray
4.1 系统设置
SSH服务
切换至root创建密码
sudo -i
# 切换至 root 账号
passwd
# 修改密码
修改ssh配置
vi /etc/ssh/sshd_config
# 编辑 sshd_config

添加或修改Port 22222以确保SSH端口安全.
查找到#PermitRootLogin yes,去掉#注释符号.
查找到#PasswordAuthentication yes,去掉#注释符号.
查找到#ClientAliveInterval 0,去掉#注释符号,0改为30.
查找到#MaxSessions 10,去掉#注释符号.
重启ssh服务
systemctl restart sshd
# 重启 sshd 生效
防火墙
关闭防火墙
systemctl stop firewalld
systemctl disable firewalld
修改主机名
甲骨文云的
CentOS 7在使用hostnamectl set-hostname命令修改主机名时,重启服务器后依旧会恢复为 Web 端创建实例时所设置的名字.网上查找了各种方法都无效,最终找到了解决方案.
编辑修改oci-hostname.conf文件
vi /etc/oci-hostname.conf将PRESERVE_HOSTINFO=0中的的值0修改为1
# This configuration file controls the hostname persistence behavior for Oracle Linux
# compute instance on Oracle Cloud Infrastructure (formerly Baremetal Cloud Services)
# Set PRESERVE_HOSTINFO to one of the following values
#   0 -- default behavior to update hostname, /etc/hosts and /etc/resolv.conf to
#        reflect the hostname set during instance creation from the metadata service
#   1 -- preserve user configured hostname across reboots; update /etc/hosts and
#           /etc/resolv.conf from the metadata service
#   2 -- preserve user configured hostname across instance reboots; no custom
#        changes to /etc/hosts and /etc/resolv.conf from the metadata service,
#        but dhclient will still overwrite /etc/resolv.conf
#   3 -- preserve hostname and /etc/hosts entries across instance reboots;
#        update /etc/resolv.conf from instance metadata service
PRESERVE_HOSTINFO=0使用hostnamectl set-hostname命令修改主机名即可.重启也不会失效.
hostnamectl set-hostname xxxxxx卸载相关程序
rpcbind
使用netstat -ntlp命令发现rpcbind监听了111端口,如担心安全可执行以下命令卸载禁用:
systemctl stop rpcbind
systemctl stop rpcbind.socket
systemctl disable rpcbind
systemctl disable rpcbind.socket
oracle-cloud-agent
卸载甲骨文云官方后台监控程序
systemctl stop oracle-cloud-agent
systemctl disable oracle-cloud-agent
systemctl stop oracle-cloud-agent-updater
systemctl disable oracle-cloud-agent-updater
4.2 安装BBRPlus
参考:https://www.ioiox.com/archives/63.html
Oracle VPS部署BBR,按普通的方式安装,将导致BBR安装并重启机器后,服务器失联,需要安装特定的内核,并作一些列设置
升级内核
更新 yum
yum -y update查看内核
uname -r
# 内核版本 3.10.0-1062.12.1.el7.x86_64手动下载秋水 BBRPlus版内核
wget https://raw.githubusercontent.com/chiakge/Linux-NetSpeed/master/bbrplus/centos/7/kernel-4.14.129-bbrplus.rpm手动安装内核
yum -y install kernel-4.14.129-bbrplus.rpm更新引导
grub2-mkconfig -o /boot/grub2/grub.cfg
grub2-mkconfig -o /boot/efi/EFI/centos/grub.cfg
列出系统开机启动项
sudo awk -F\' '$1=="menuentry " {print i++ " : " $2}' /boot/efi/EFI/centos/grub.cfg设置新版内核默认启动项
grub2-set-default 0重启
reboot开启 BBRPlus 及优化
下载秋水一键脚本tcp.sh,选择7开启BBRPlus加速.
等脚本退出后,再次./tcp.sh运行脚本,选择10优化,过程中需要重启。
wget -N --no-check-certificate "https://raw.githubusercontent.com/chiakge/Linux-NetSpeed/master/tcp.sh" && chmod +x tcp.sh && ./tcp.sh4.3 安装V2Ray
在梯子服务器,wget下载一键搭建脚本
wget https://gist.githubusercontent.com/JodenHe/815dd91277b722d36a860d39c2296083/raw/7f2b5ac0f8137b245d44741fc4a9f40cffa36755/v2Ray-install.sh20230228更新
因为其中下载链接中的v2ray分支更新,需要改成继续使用老版本,错误日志如下
安装V2ray...
 安装V2Ray v5.3.0 ,架构64
 下载V2Ray: https://github.com/v2fly/v2ray-core/releases/download/v5.3.0/v2ray-linux-64.zip
  % Total    % Received % Xferd  Average Speed   Time    Time     Time  Current
                                 Dload  Upload   Total   Spent    Left  Speed
  0     0    0     0    0     0      0      0 --:--:-- --:--:-- --:--:--     0
100 11.1M  100 11.1M    0     0  11.8M      0 --:--:-- --:--:-- --:--:-- 59.4M
Archive:  /tmp/v2ray/v2ray.zip
  inflating: /tmp/v2ray/config.json
  inflating: /tmp/v2ray/geosite.dat
  inflating: /tmp/v2ray/geoip-only-cn-private.dat
   creating: /tmp/v2ray/systemd/
   creating: /tmp/v2ray/systemd/system/
  inflating: /tmp/v2ray/systemd/system/v2ray.service
  inflating: /tmp/v2ray/systemd/system/[email protected]
  inflating: /tmp/v2ray/vpoint_socks_vmess.json
  inflating: /tmp/v2ray/geoip.dat
  inflating: /tmp/v2ray/v2ray
  inflating: /tmp/v2ray/vpoint_vmess_freedom.json
cp: cannot stat ‘/tmp/v2ray/v2ctl’: No such file or directory
chmod: cannot access ‘/usr/bin/v2ray/v2ctl’: No such file or directory
 V2ray安装失败
修改脚本内容
sed -i 's/${NEW_VER}/v4.45.2/g' v2Ray-install.sh继续执行脚本
bash v2Ray-install.sh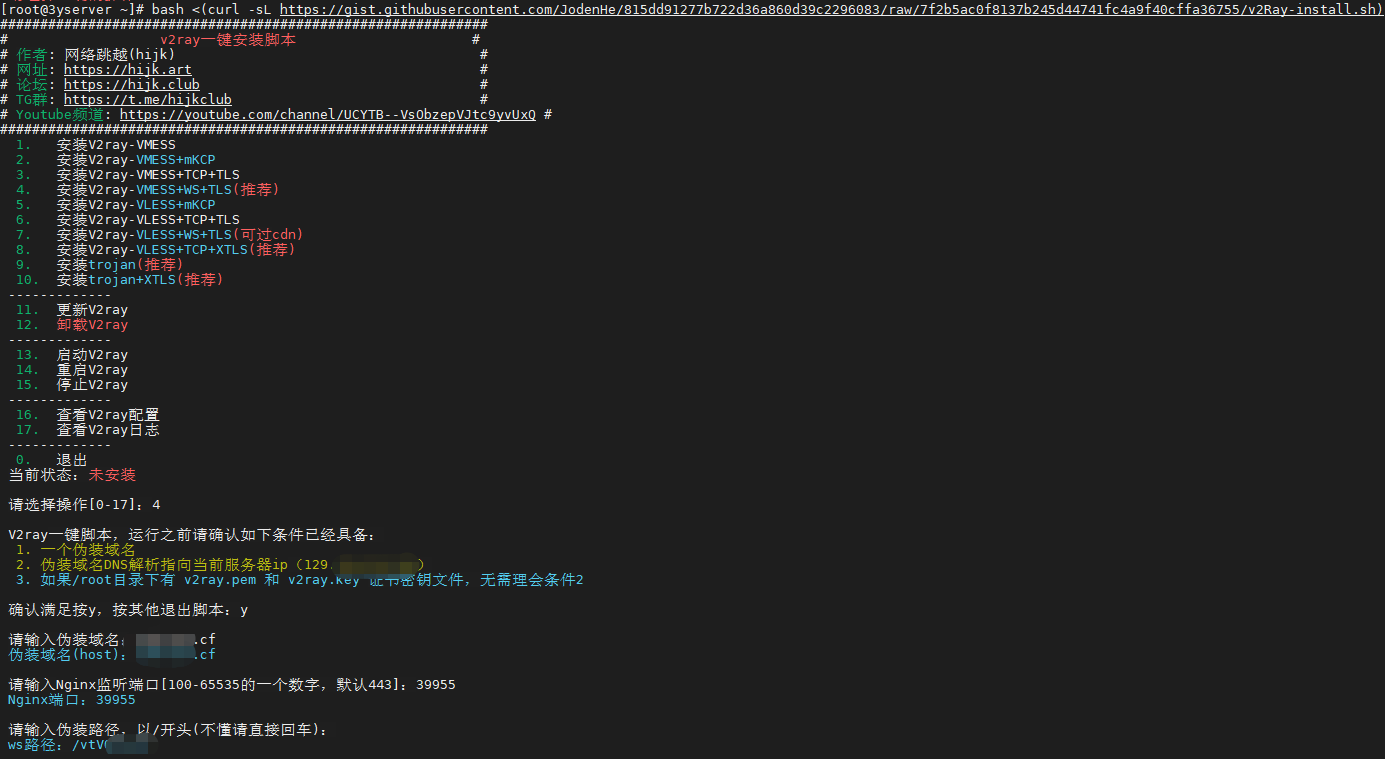
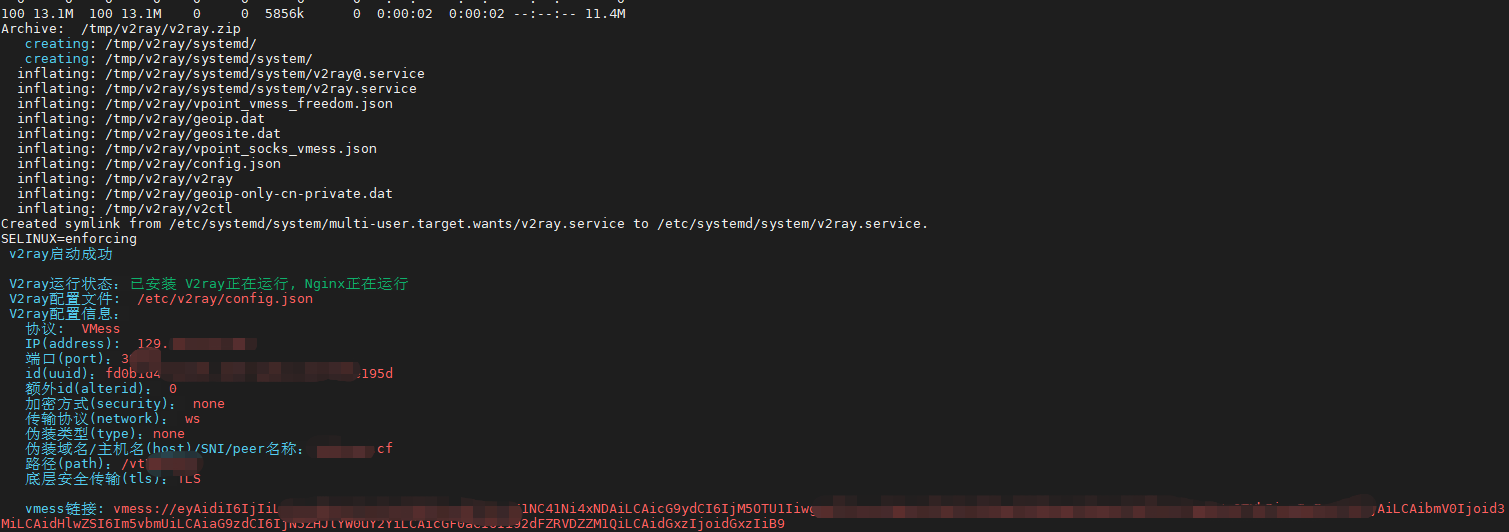
BBR已经安装过,这里选n (笔者第一次在这选y直接安装BBR,结果服务器重启后失联,没法登录,后采用4.2小节的方式,先安装BBRPlus)

安装成功,可以使用链接配置V2RayN
5 v2Ray 客户端
参考:https://tlanyan.pp.ua/v2ray-clients-download/
笔者使用的windows客户端为:V2rayN, 安卓客户端为:V2rayNG
6 参考
https://tlanyan.pp.ua/v2ray-clients-download/
https://baijiahao.baidu.com/s?id=1689185764130254565&wfr=spider&for=pc